
Add, Delete and Reorder Spreads with AlbumPrüfr
Reorder spreads
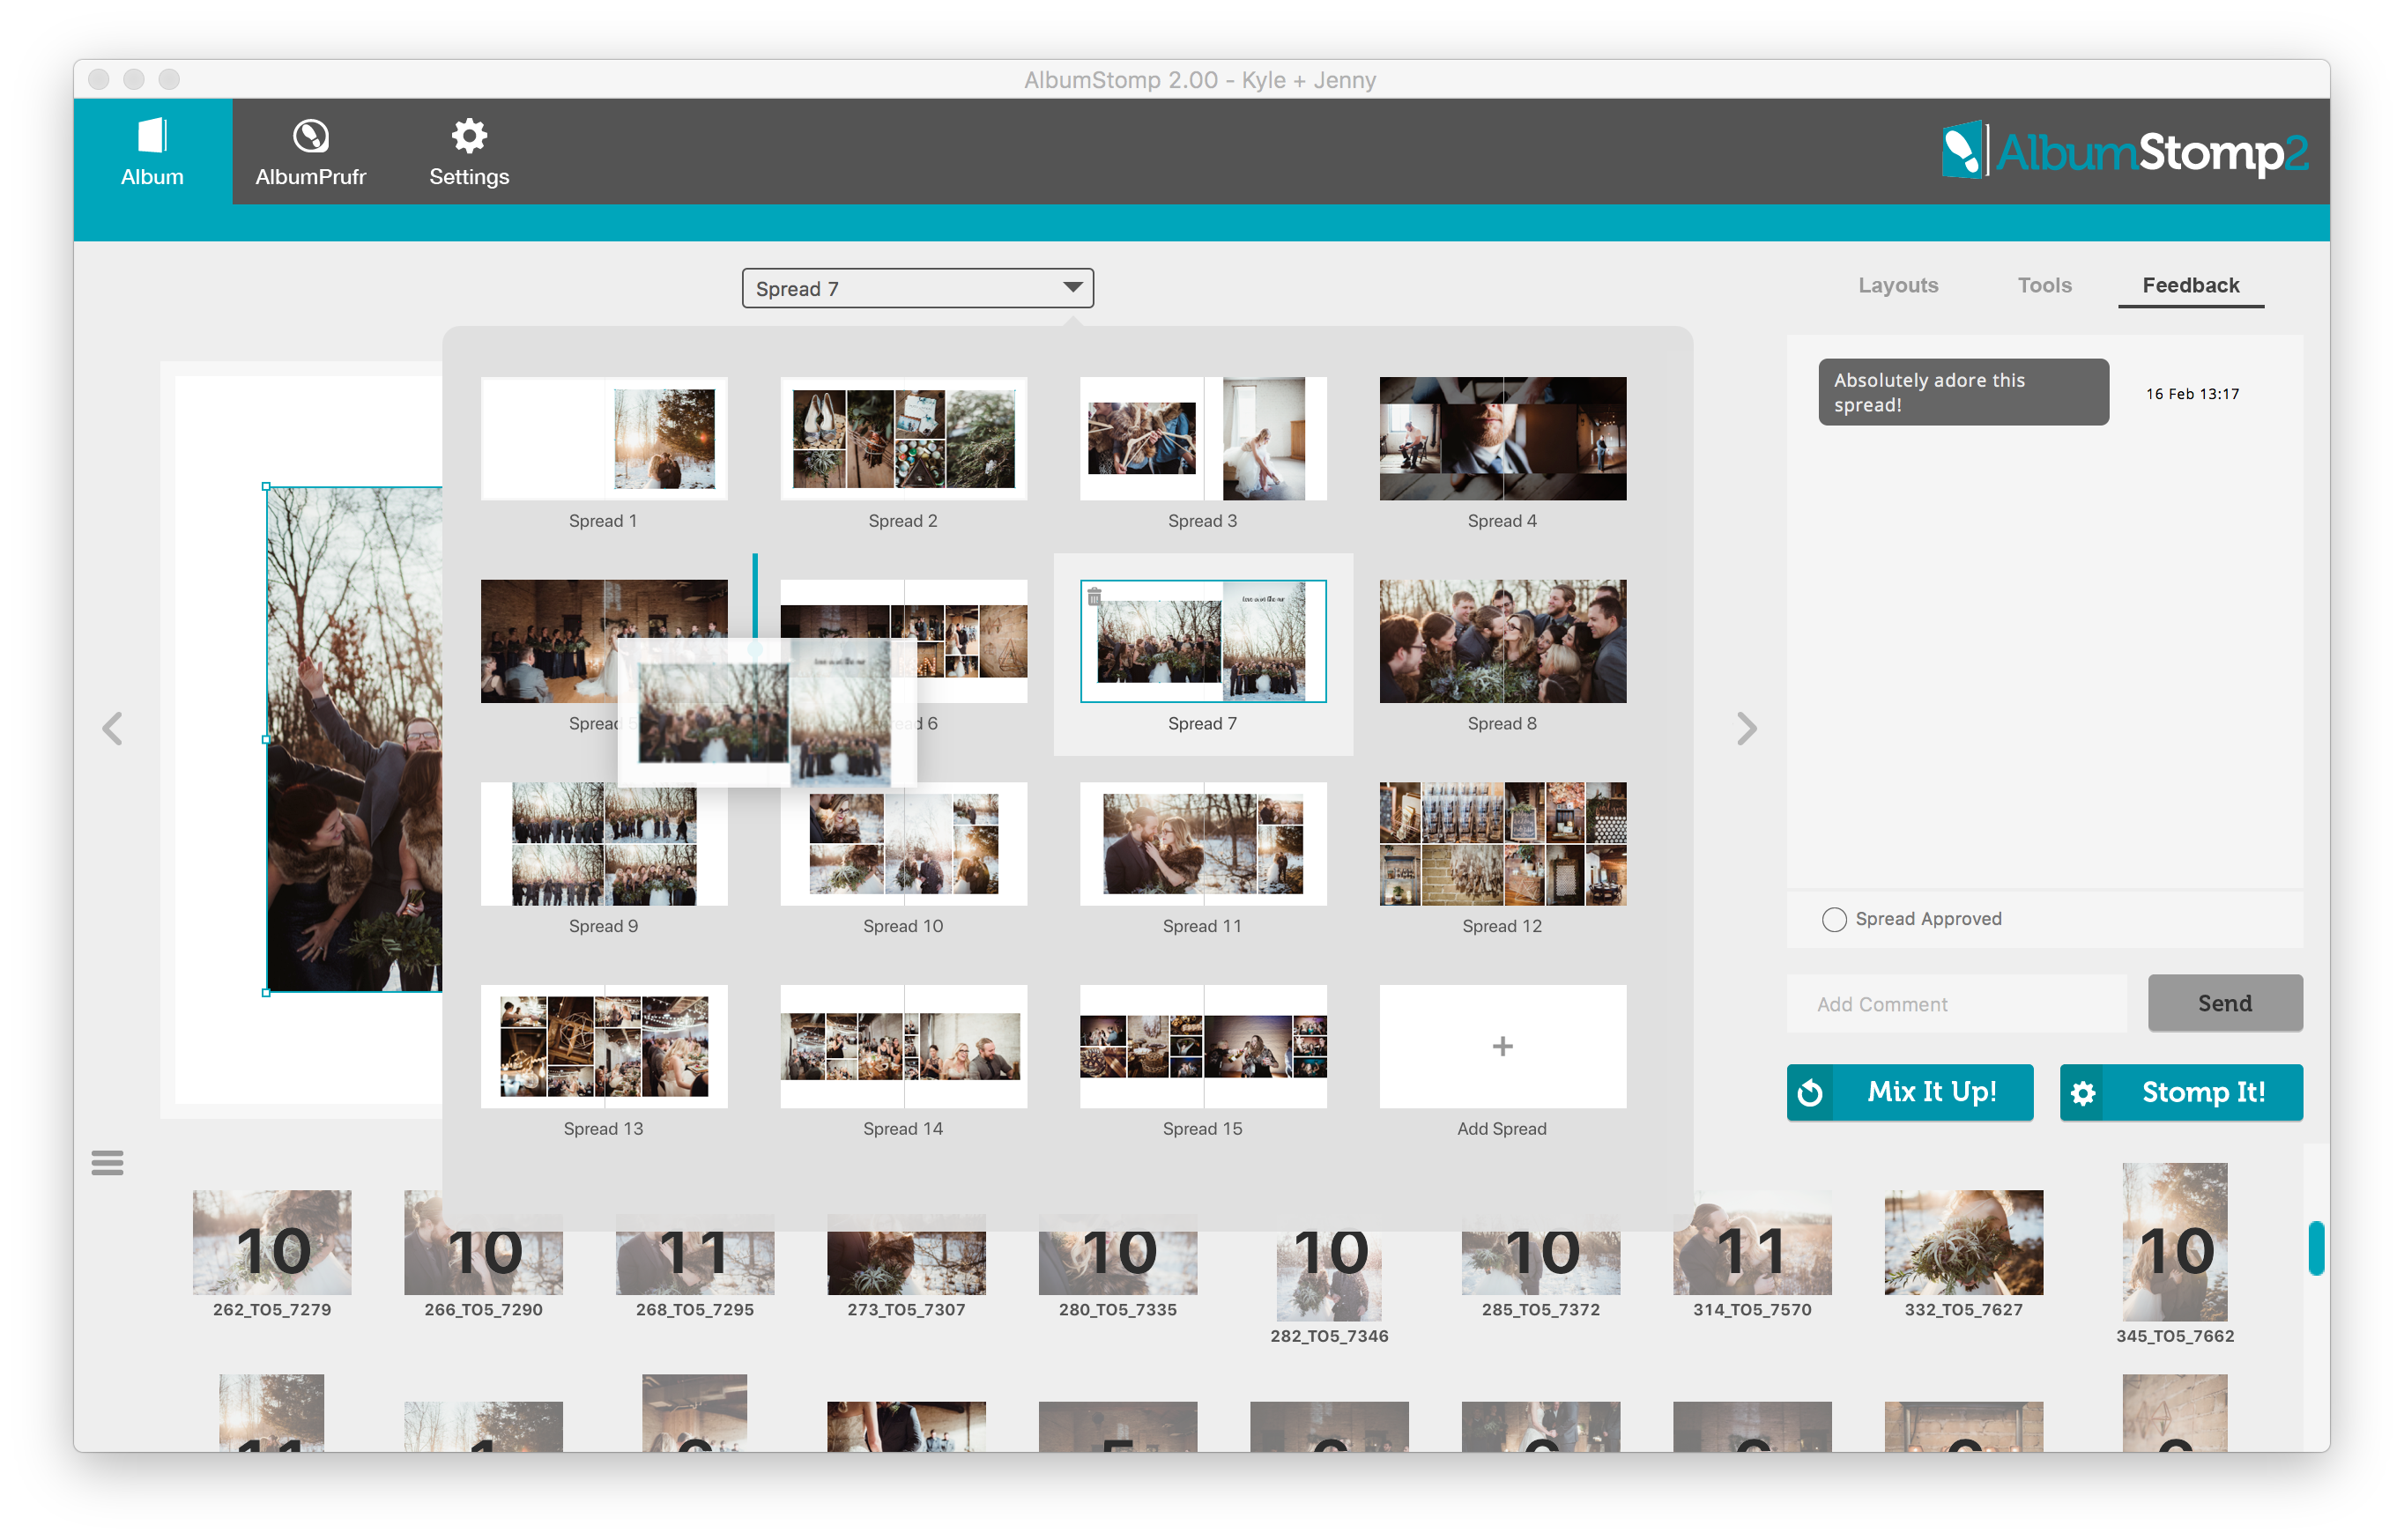
If you designed in AlbumStomp, open your album and click on the spread navigator on the top middle of the page spread. Select the spread that you wish to move and drag it around. A blue indicator line will show you were you are reordering it to 🙂 Remember to go to AlbumPrüfr when you’ve finished and hit “Resync”. Alternatively, when you save an quit it will resync automatically.
If you didn’t design in AlbumStomp, use our AlbumPrüfr App. Click on the spread in the timeline at the bottom and drag it left or right to where you want to move it. A yellow line indicator will show you where you’re moving it to and that’s it!

Add spreads
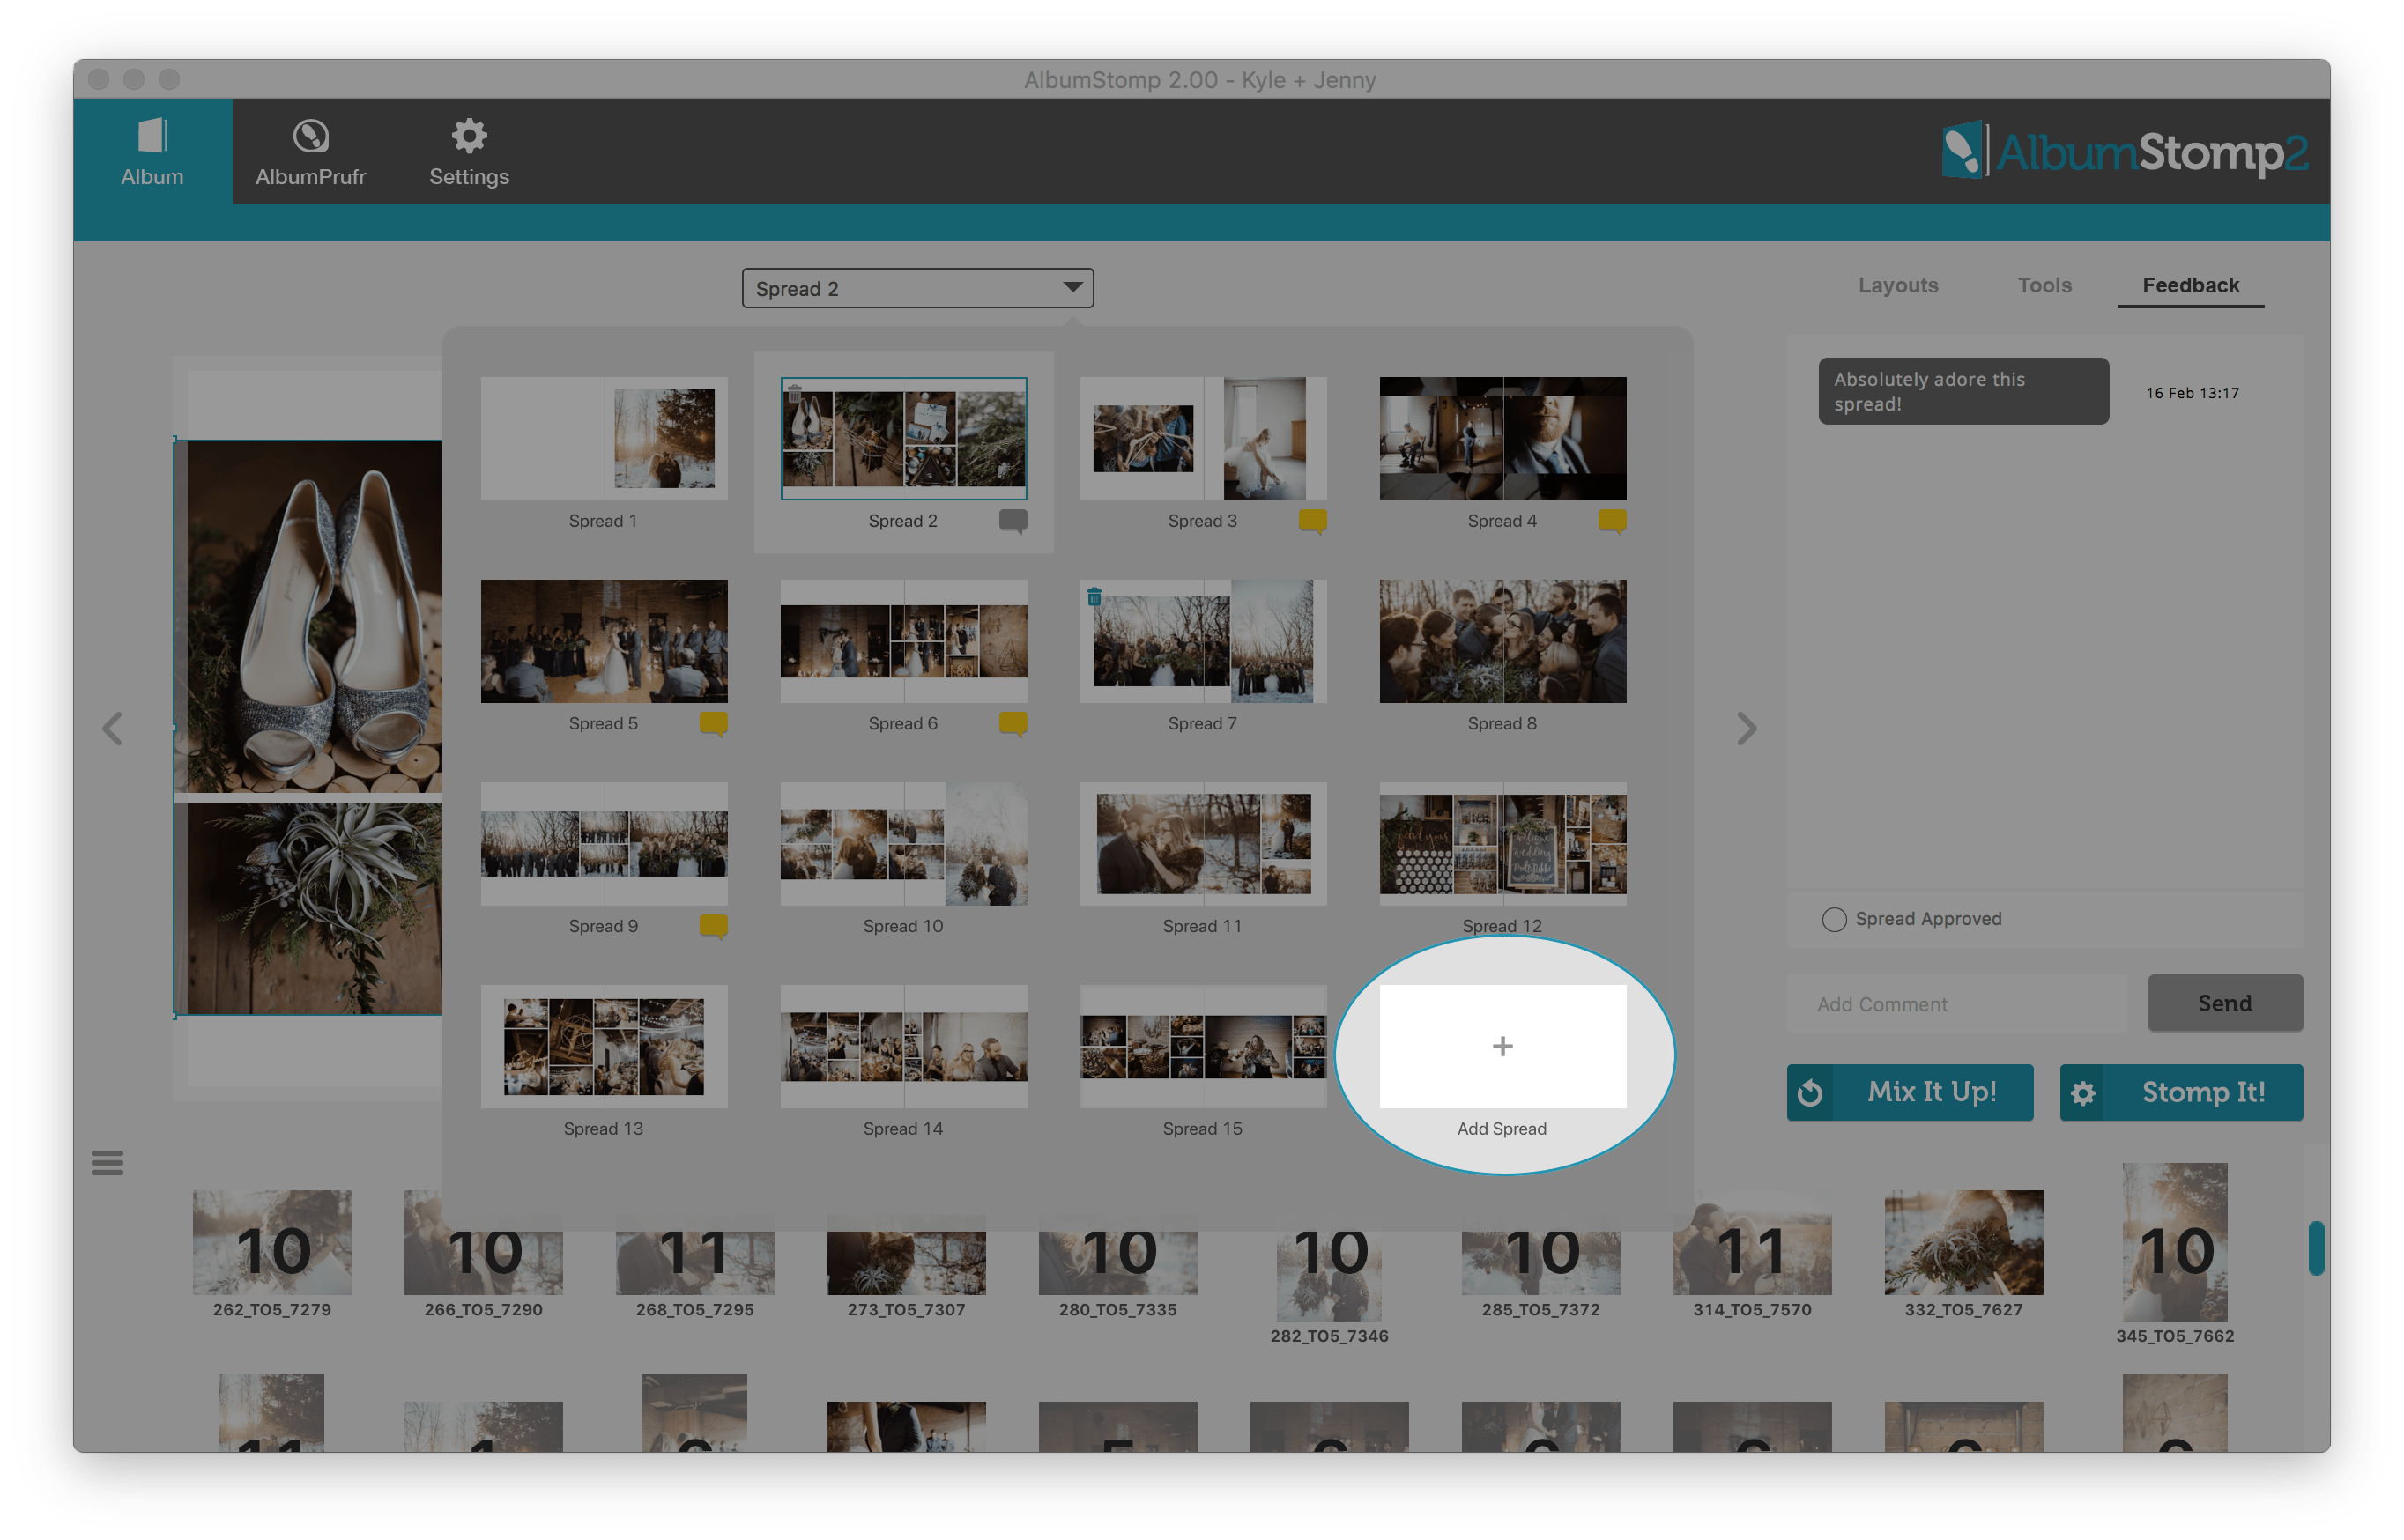
With AlbumStomp this is suuuper easy. Head to the spread navigator and just click “Add Spread”. This is the last spread found in the spread navigator. This new spread will appear where the “Add Spread” spread is currently. Remember to go to AlbumPrüfr when you’ve finished adding pages and hit “Resync”. Alternatively, when you save an quit it will resync automatically.
With the AlbumPrüfr App you have two options:
– Drag the spread from Finder (Mac) or Documents (Windows) into the timeline at the bottom of the AlbumPrüfr window. The yellow indicator will show you where you’re going to add the spread.

– Otherwise click the plus icon from the lower left hand corner and the “Add Spread” window will open. You can choose the position from the drop down menu, or the default is before the current spread that you have selected. Drop the spread onto the “Drag Spread Here” icon or click it and select the spread you want to add. Then click update, it’s that easy.

Delete spreads
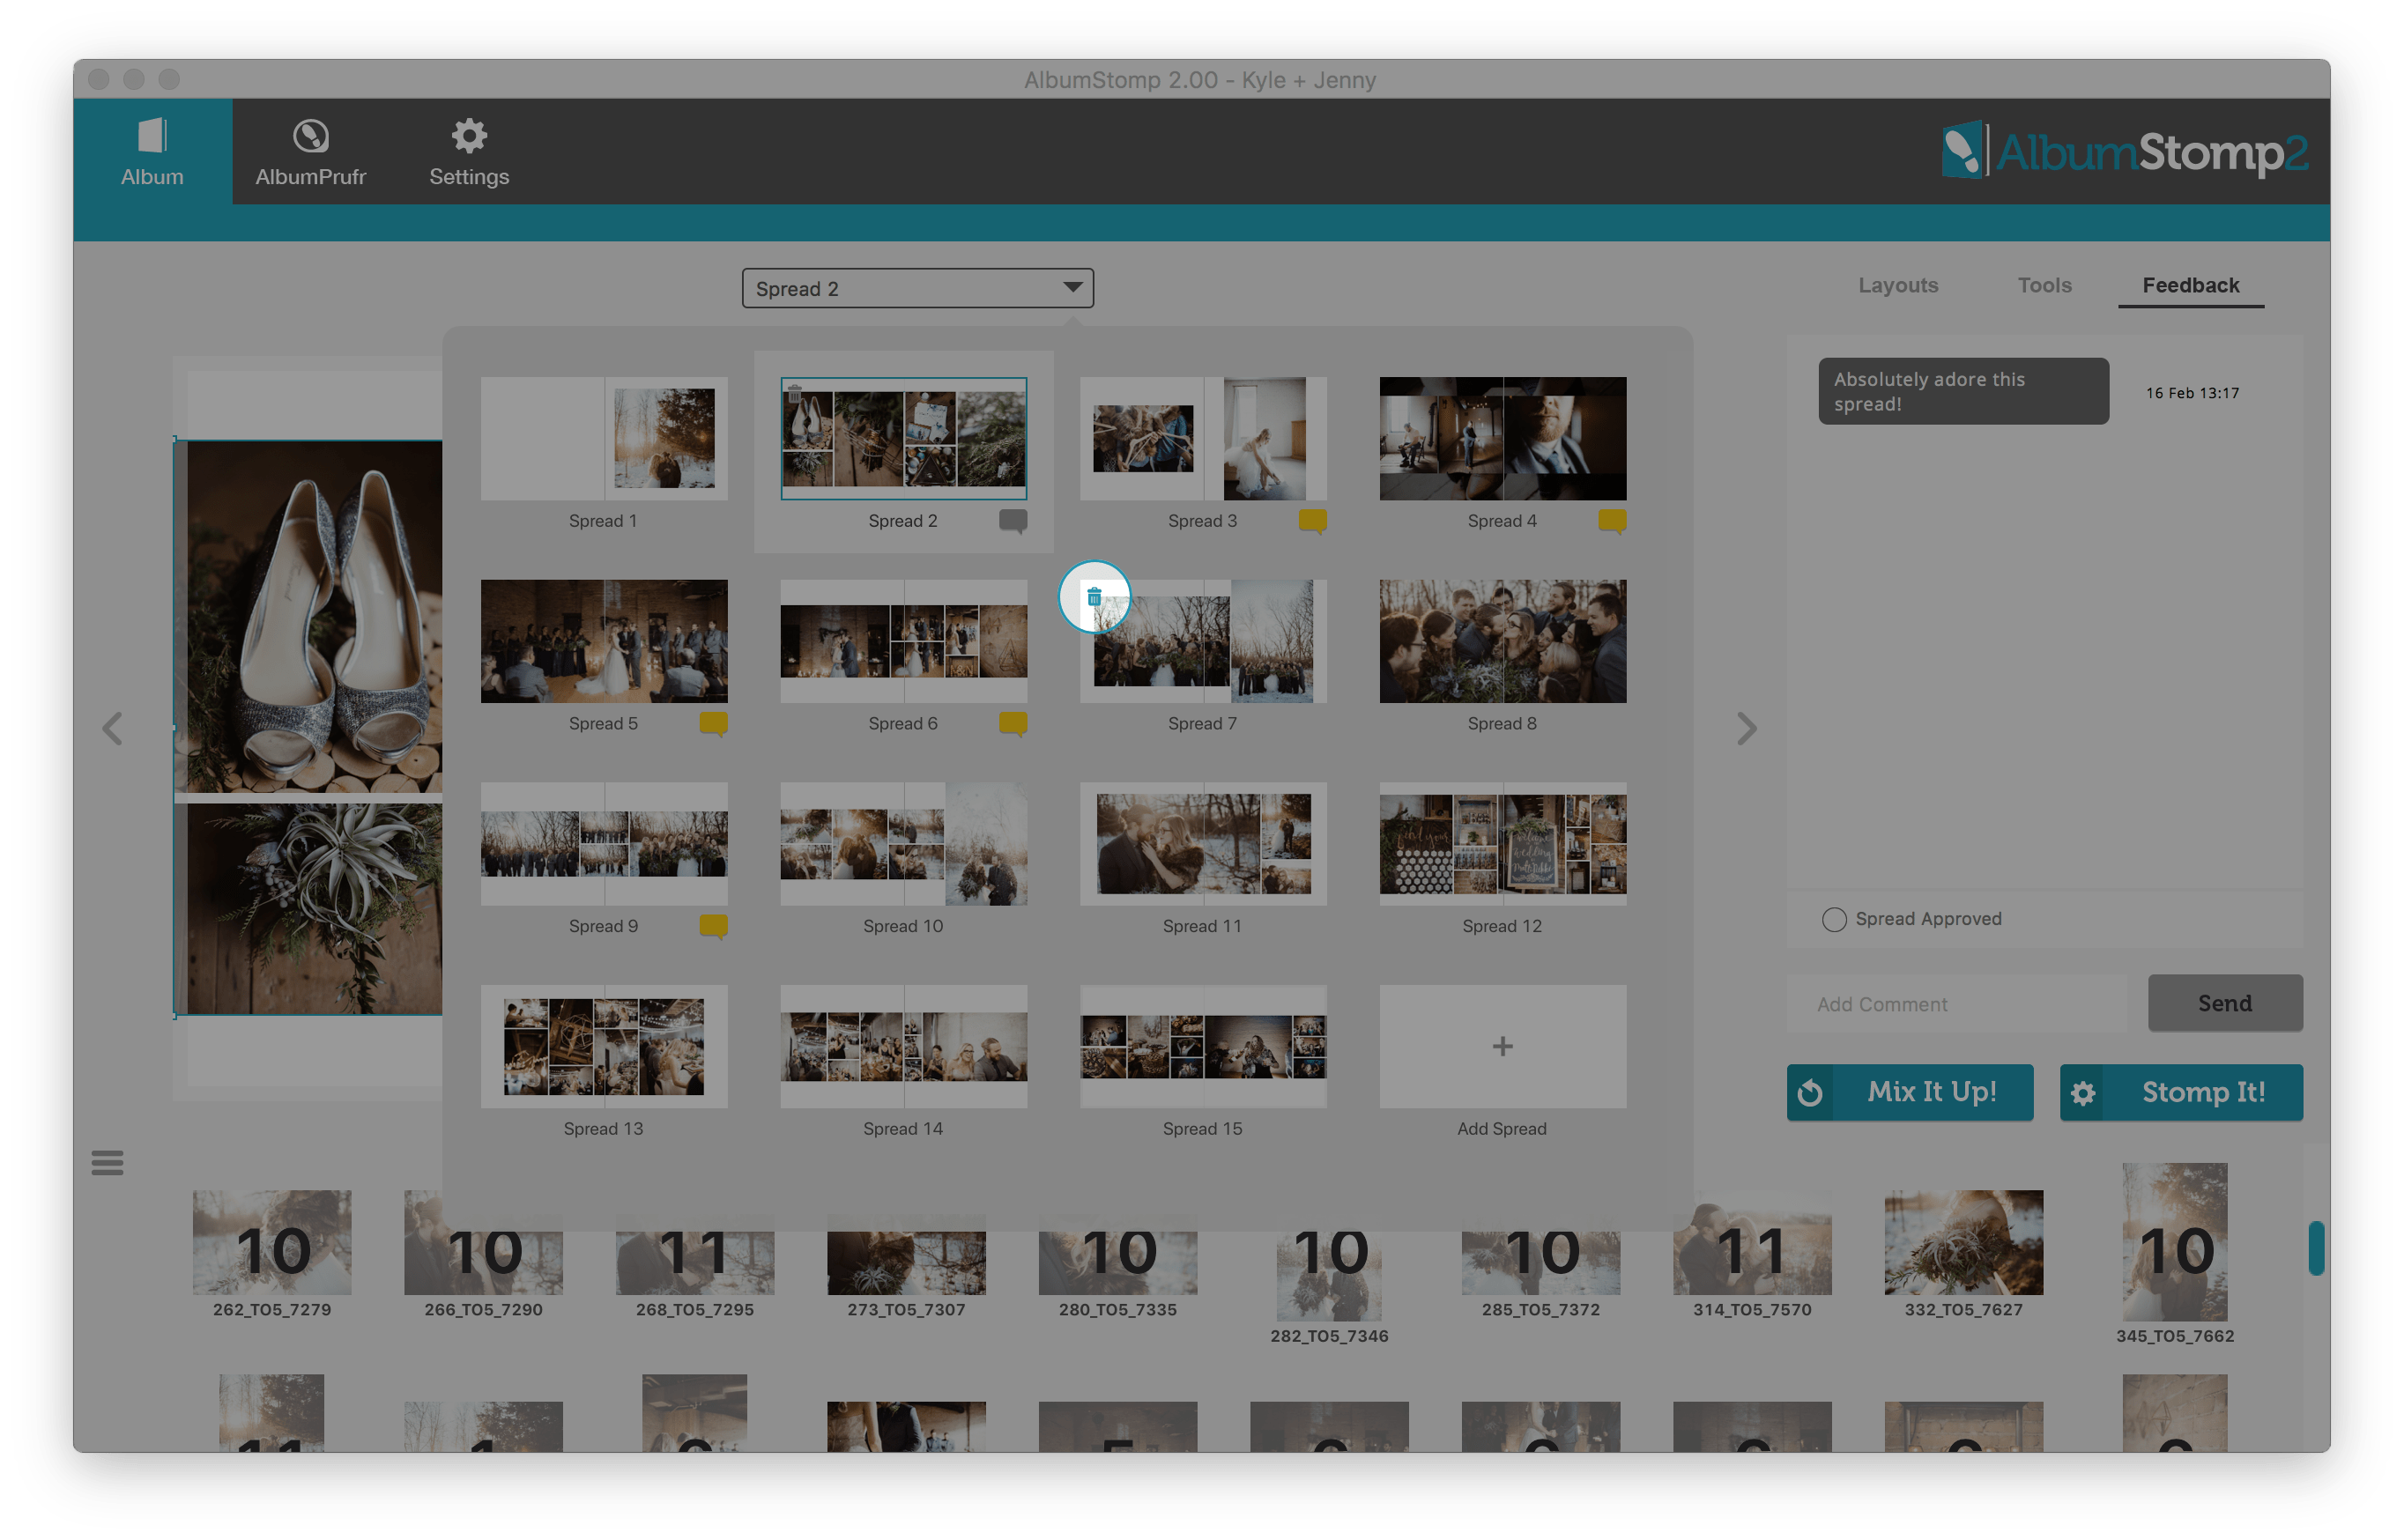
In AlbumStomp go to the spread navigator and hover over the spread thumbnail that you want to delete. A blue bin icon will appear in the top left hand corner of the spread, click that. Remember to go to AlbumPrüfr when you’ve finished and hit “Resync”for it to be updated on Prüfr.com. Alternatively, when you save an quit it will resync automatically.
In the AlbumPrüfr App, again you have two options. 🙂 Either select the spread you want to delete and hit the “delete” key on your keyboard, OR click the cross in the lower left hand corner. You’ll be prompted with a warning to make sure that you want to delete the spread.

Happy Stomping!!
Thanks very much to Twig and Olive Photography and Katie Lamb for her amazing photos!
Still can't find what you're looking for? We're here to help